← All work
Hanger Clinic/Orthotics and prosthetics/Clinical ordering tool

Ordering a custom brace, guided by what the patient needs to do.

I led the design of the Guided Configurator, the tool Hanger Clinic clinicians use to specify and order custom ankle-foot orthoses (AFOs), replacing orders placed by phone or through a generic web form. It starts from the patient's own mobility goals, then walks the clinician through every measurement, material, and alignment decision in one place, with a live picture of the device they're building.

$3M
Revenue growth over the previous year that the configurator contributed to
30%
Adoption so far, so the impact is still growing
Role
Lead UX designer, engaged through my independent design consultancy. Research, workflow, information architecture, interaction design, measurement diagrams, and the live device preview
Users
Orthotists and clinicians ordering custom devices for fabrication
Scope
Patient context, device selection, measurements, materials, alignment, mods, logistics, and review
Platform
Desktop web app used in the clinic, alongside the patient record
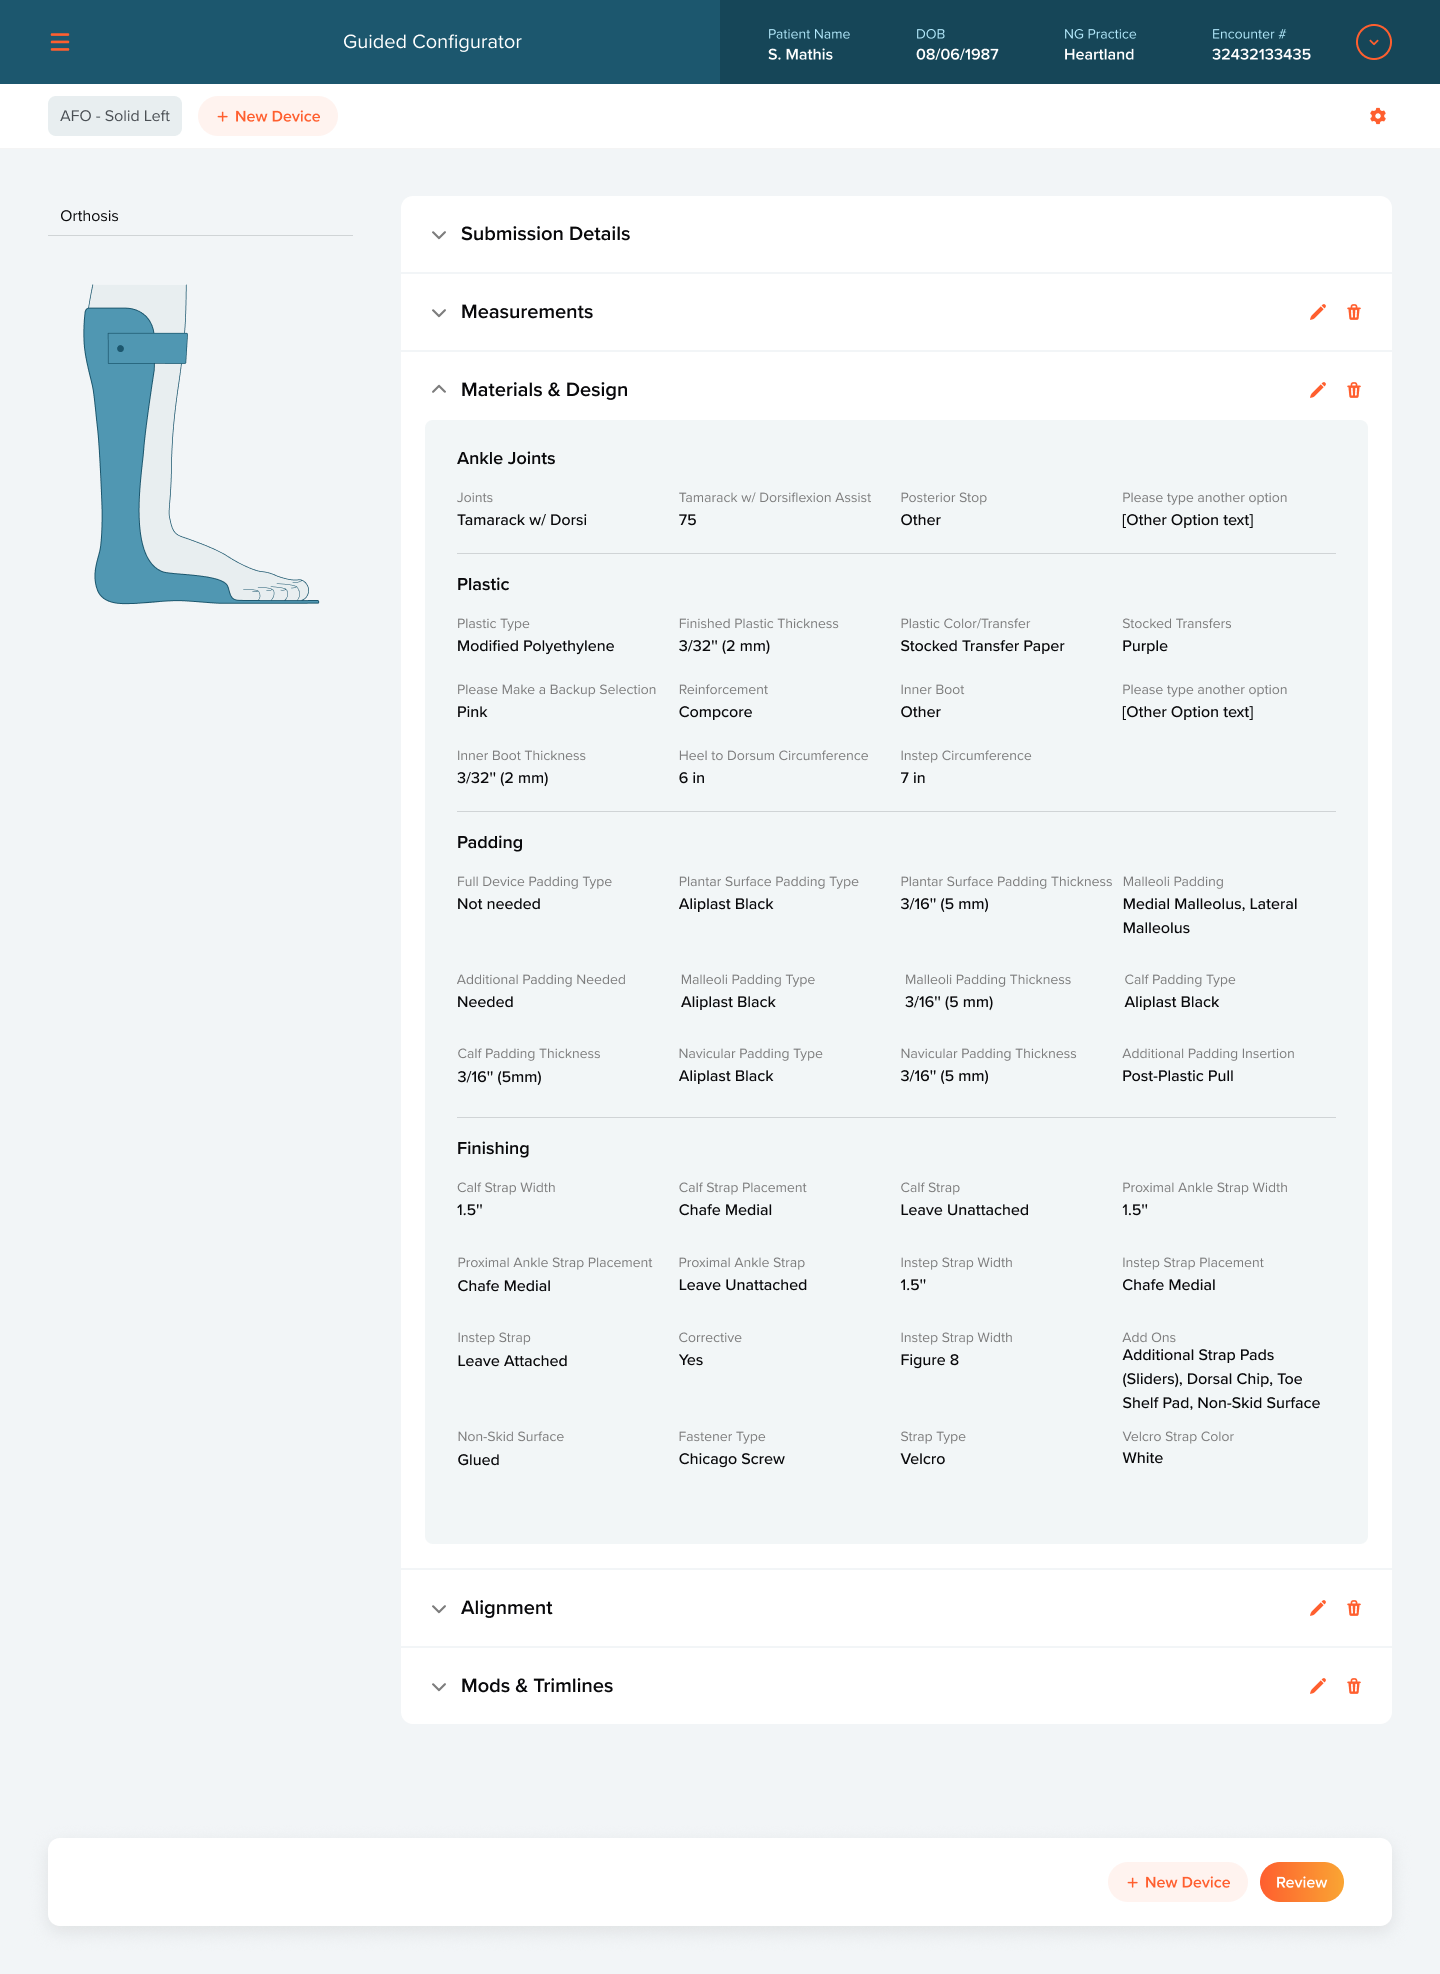
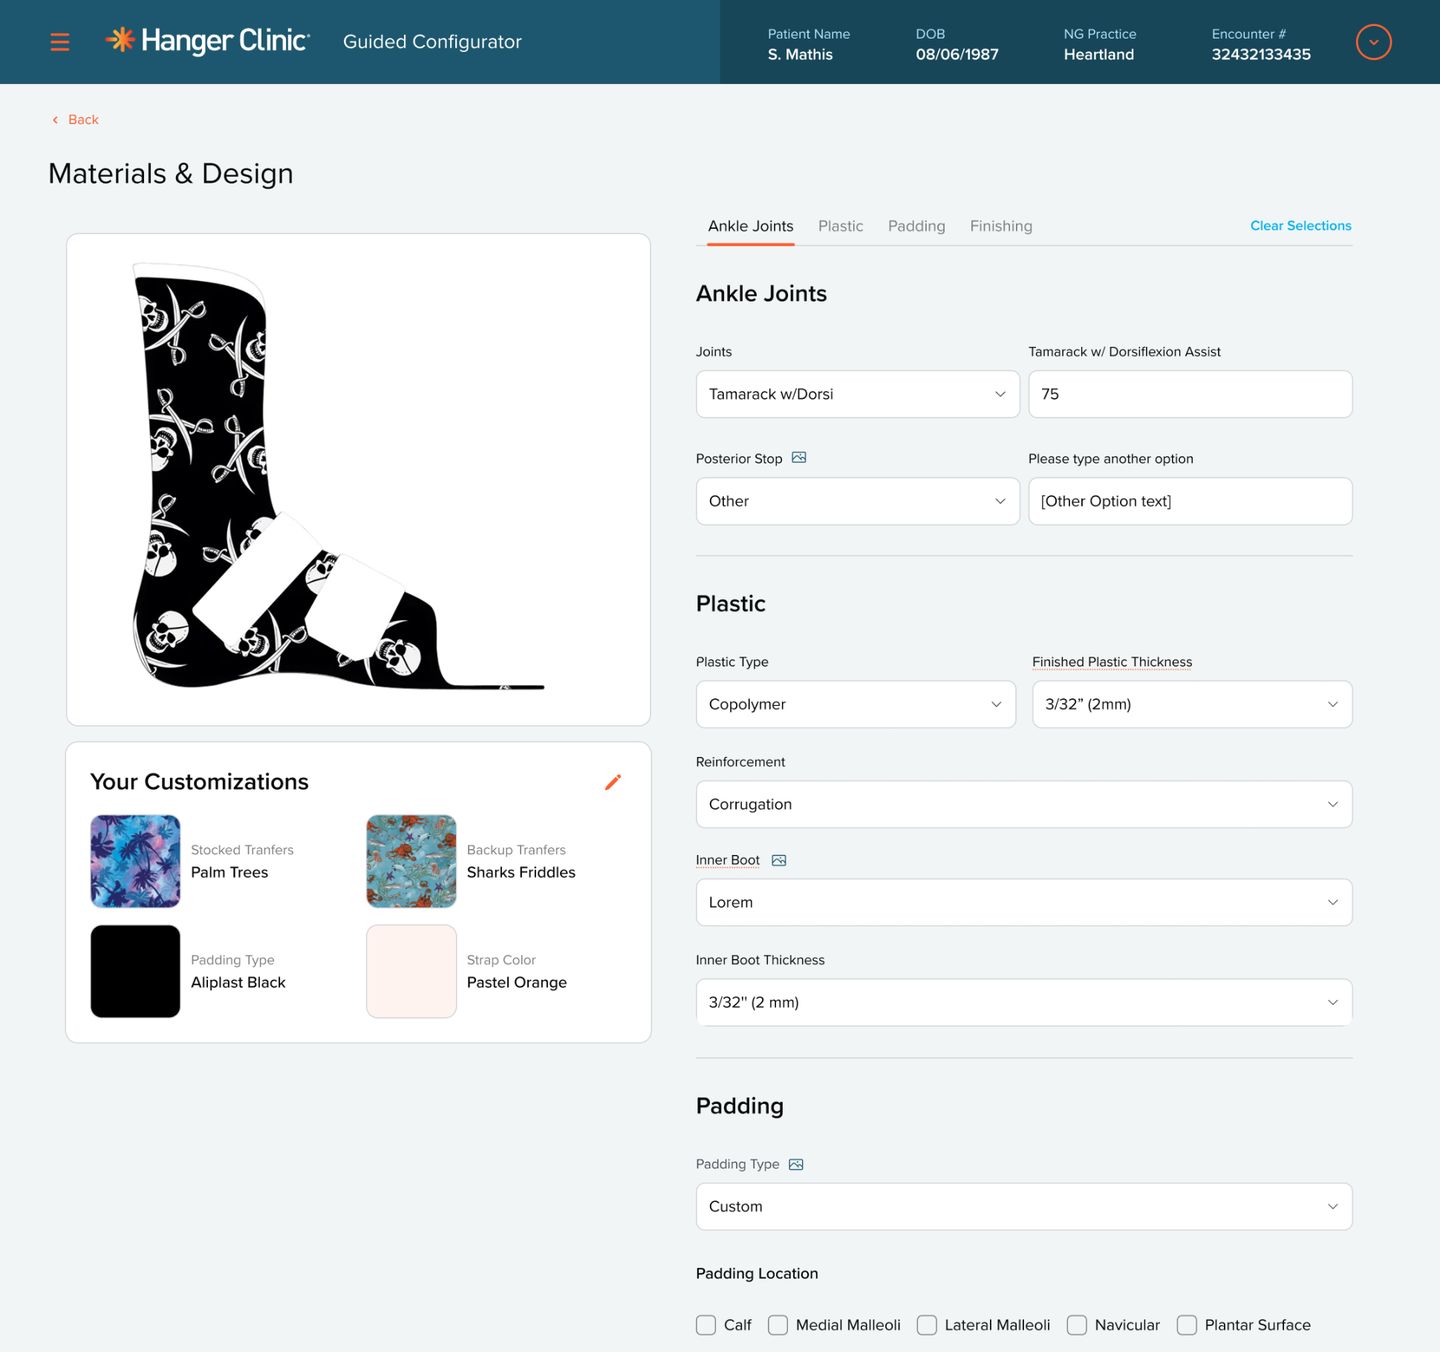
Materials and design step: a live illustration of the AFO with its chosen pattern next to ankle joint, plastic, and padding options, plus a summary of the customizations.
01 / The brief

One tool for every custom order.

  • Help clinicians choose the right device for each patient, not just fill in an order.
  • Capture every specification the fabrication team needs: measurements, joints, plastic, padding, straps, alignment, mods, and trimlines.
  • Support adult and pediatric devices, single and bilateral orders, and several devices per patient.
  • Make the order easy to check before it's sent, so devices come back right the first time.

The order was a phone call and a web form.

Clinicians placed custom AFO orders by calling them in or filling out a generic JotForm. Neither one guided them through the dozens of choices a custom brace needs, from calf circumference and plastic thickness to heel wedge angle and strap placement, and neither showed what the finished device would look like. Specs got missed or misread along the way, which meant follow-up calls, remakes, and patients waiting longer to get moving.

02 / Where the insights came from

Three views of the same order.

Watching cliniciansSitting with clinicians as they placed real orders, by phone and by form
Fabrication interviewsTalking with the lab staff who build each device from the order
Remade ordersReviewing orders that came back for remakes to find which specs went wrong

The clinicians knew what the patient needed. The lab knew what it needed to build it. The problems lived in between, in an order format that didn't guide either side.

03 / What we learned, and what we did about it

Four insights that shaped the tool.

01
Truth

The right device starts with what the patient wants to do again, not with the catalog.

Action

Open every order with the patient. "Let's get started" shows treatment side, device type, and insurance, then the four mobility tasks the patient struggled with most in their outcomes survey, like walking on uneven grass or stepping up a curb. Clinicians configure with those goals in front of them.
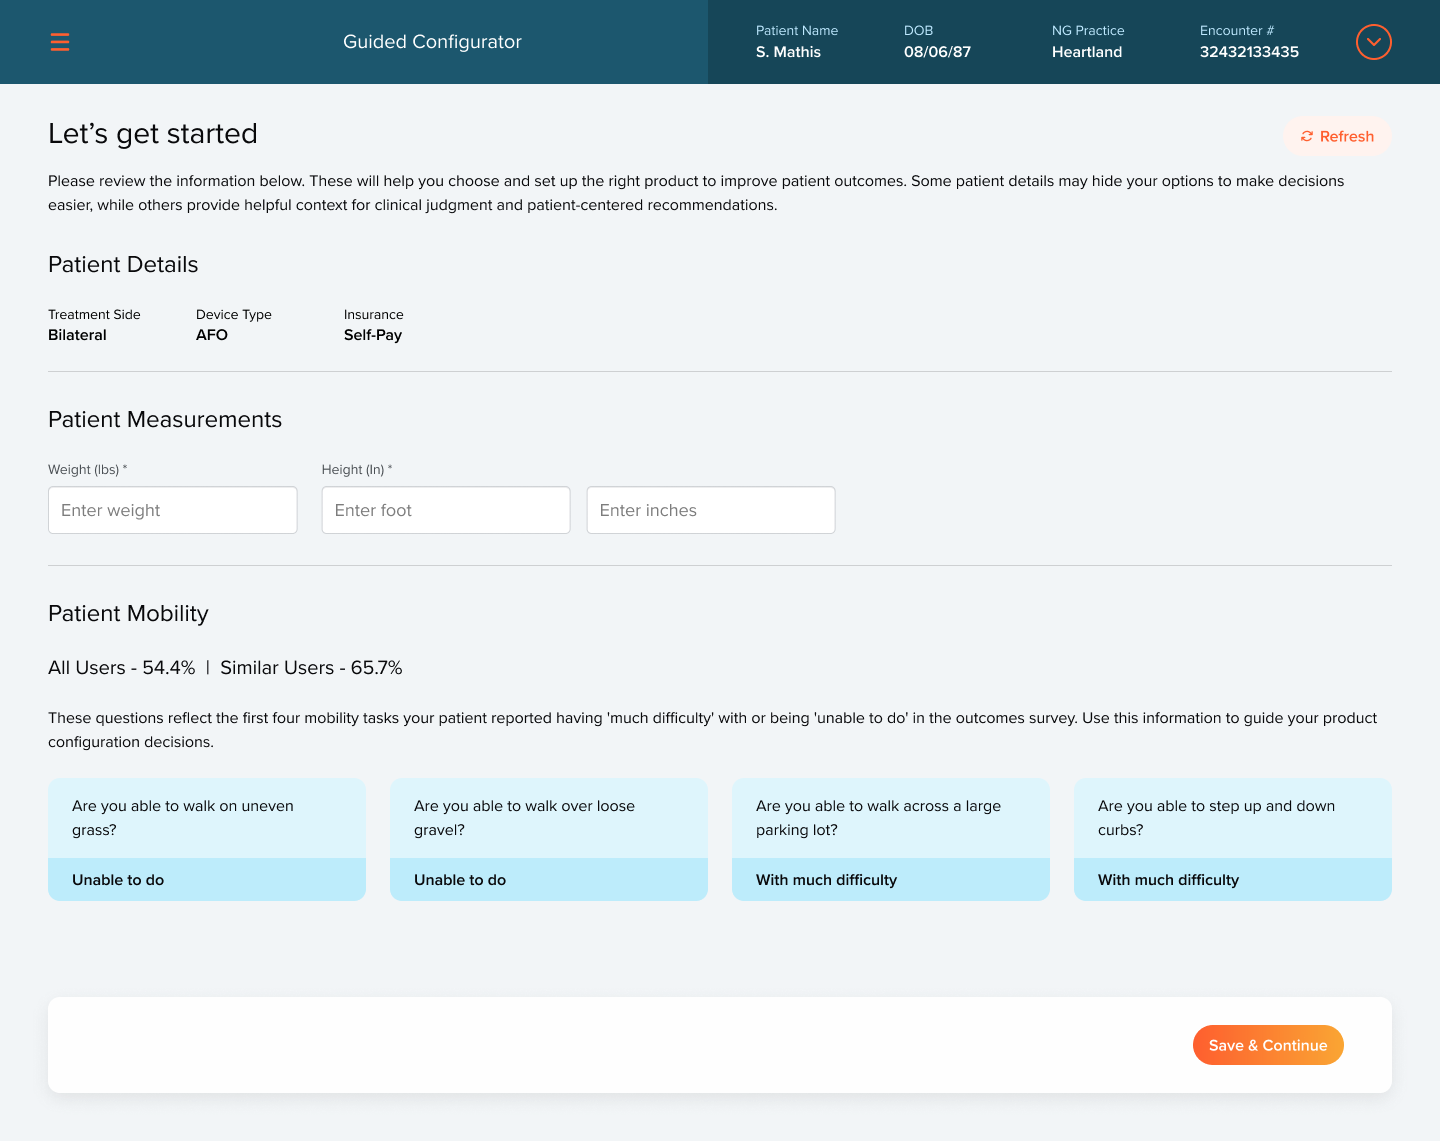
Let's get started: patient details, measurements, and four mobility tasks from the outcomes survey marked unable to do or with much difficulty.
02
Truth

Clinicians think about a device in parts, and not always in the same order.

Action

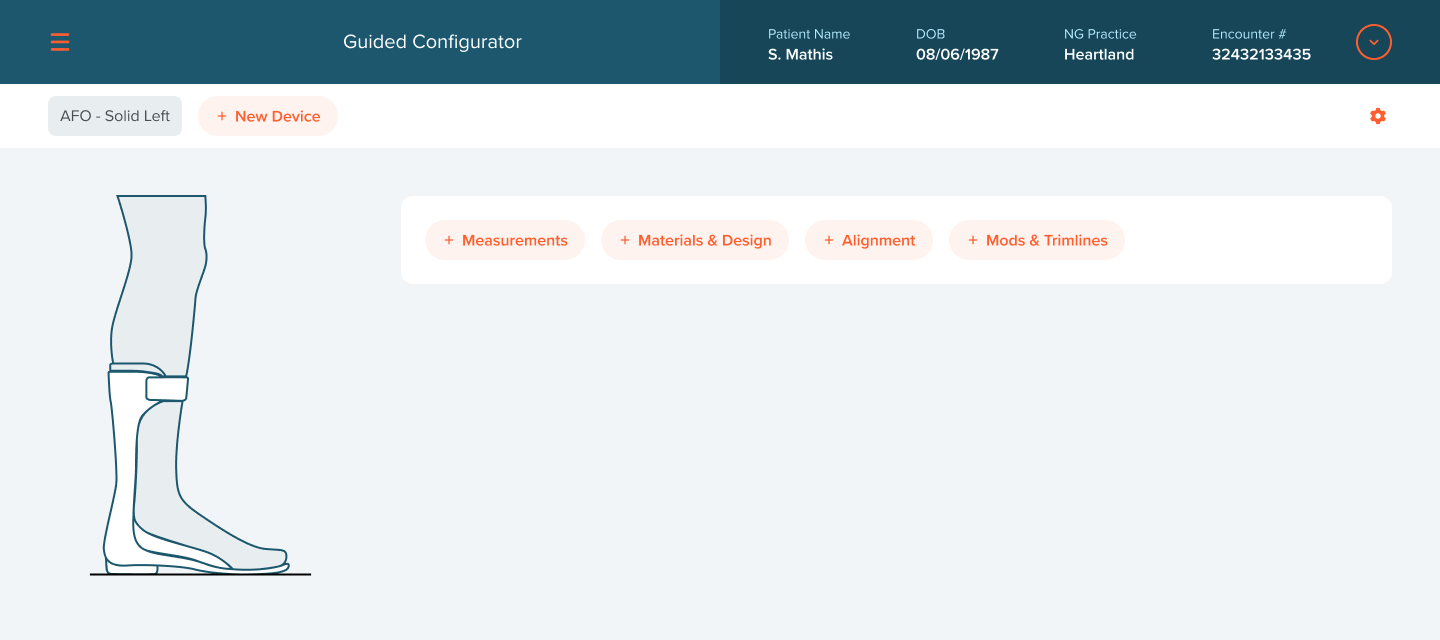
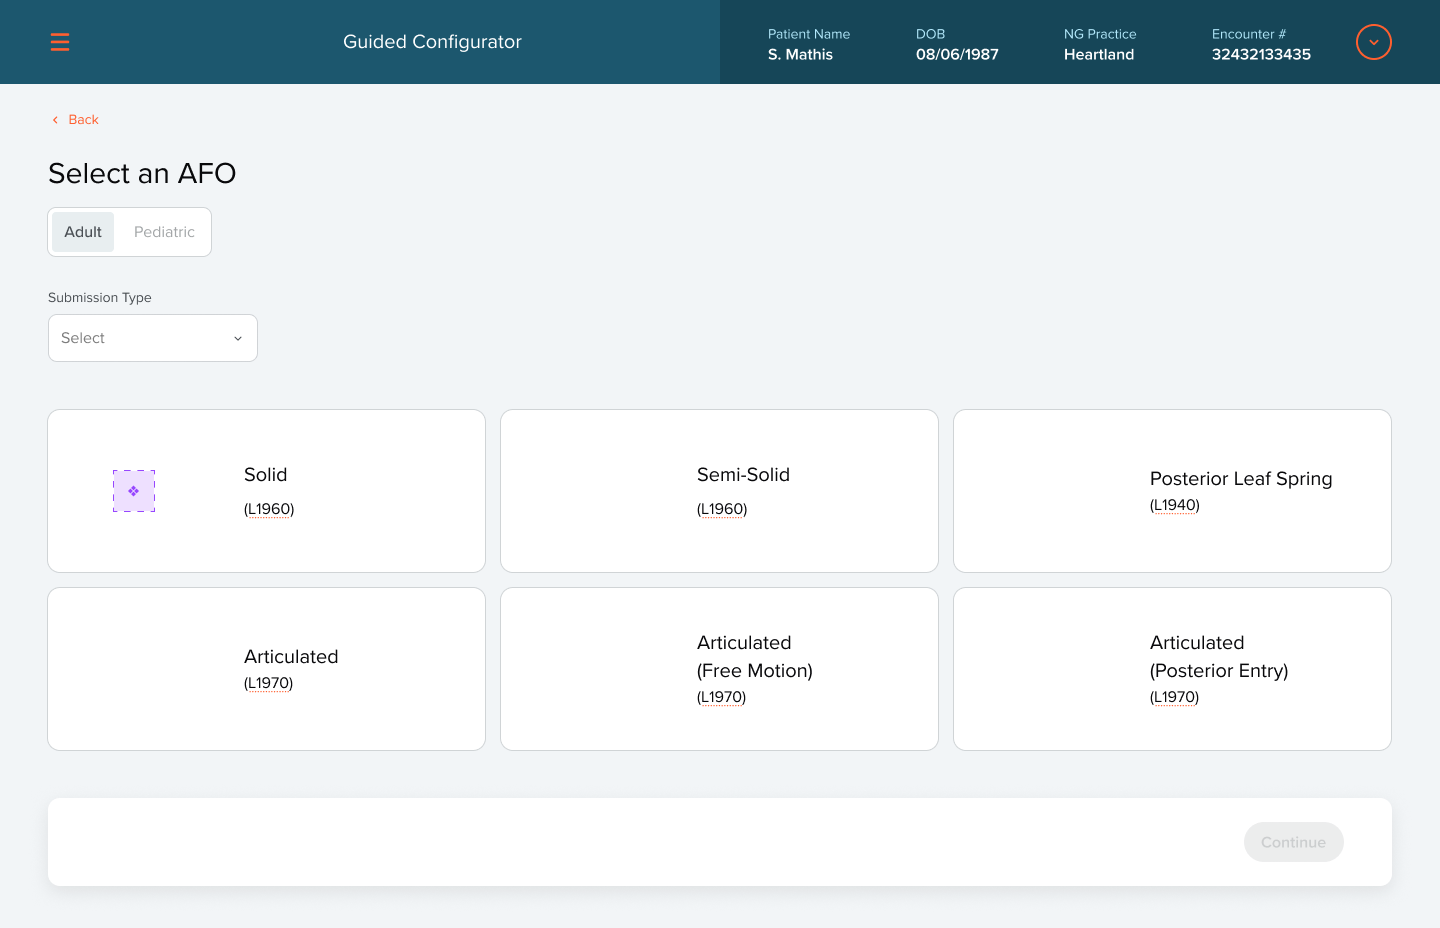
After choosing the AFO type, clinicians land on a hub with the device illustration and four sections they can add in any order: measurements, materials and design, alignment, and mods and trimlines. A second device, like the other side of a bilateral order, is one click away.

What didn't work first. The first version was a linear wizard, one section after another. Clinicians don't work that way. They often know the alignment before the materials, so a fixed order made them skip ahead and come back. That's what led to the section hub.

Select an AFO: adult or pediatric, submission type, and six AFO types with their HCPCS codes.
Device hub: AFO Solid Left with add buttons for measurements, materials and design, alignment, and mods and trimlines.
03
Truth

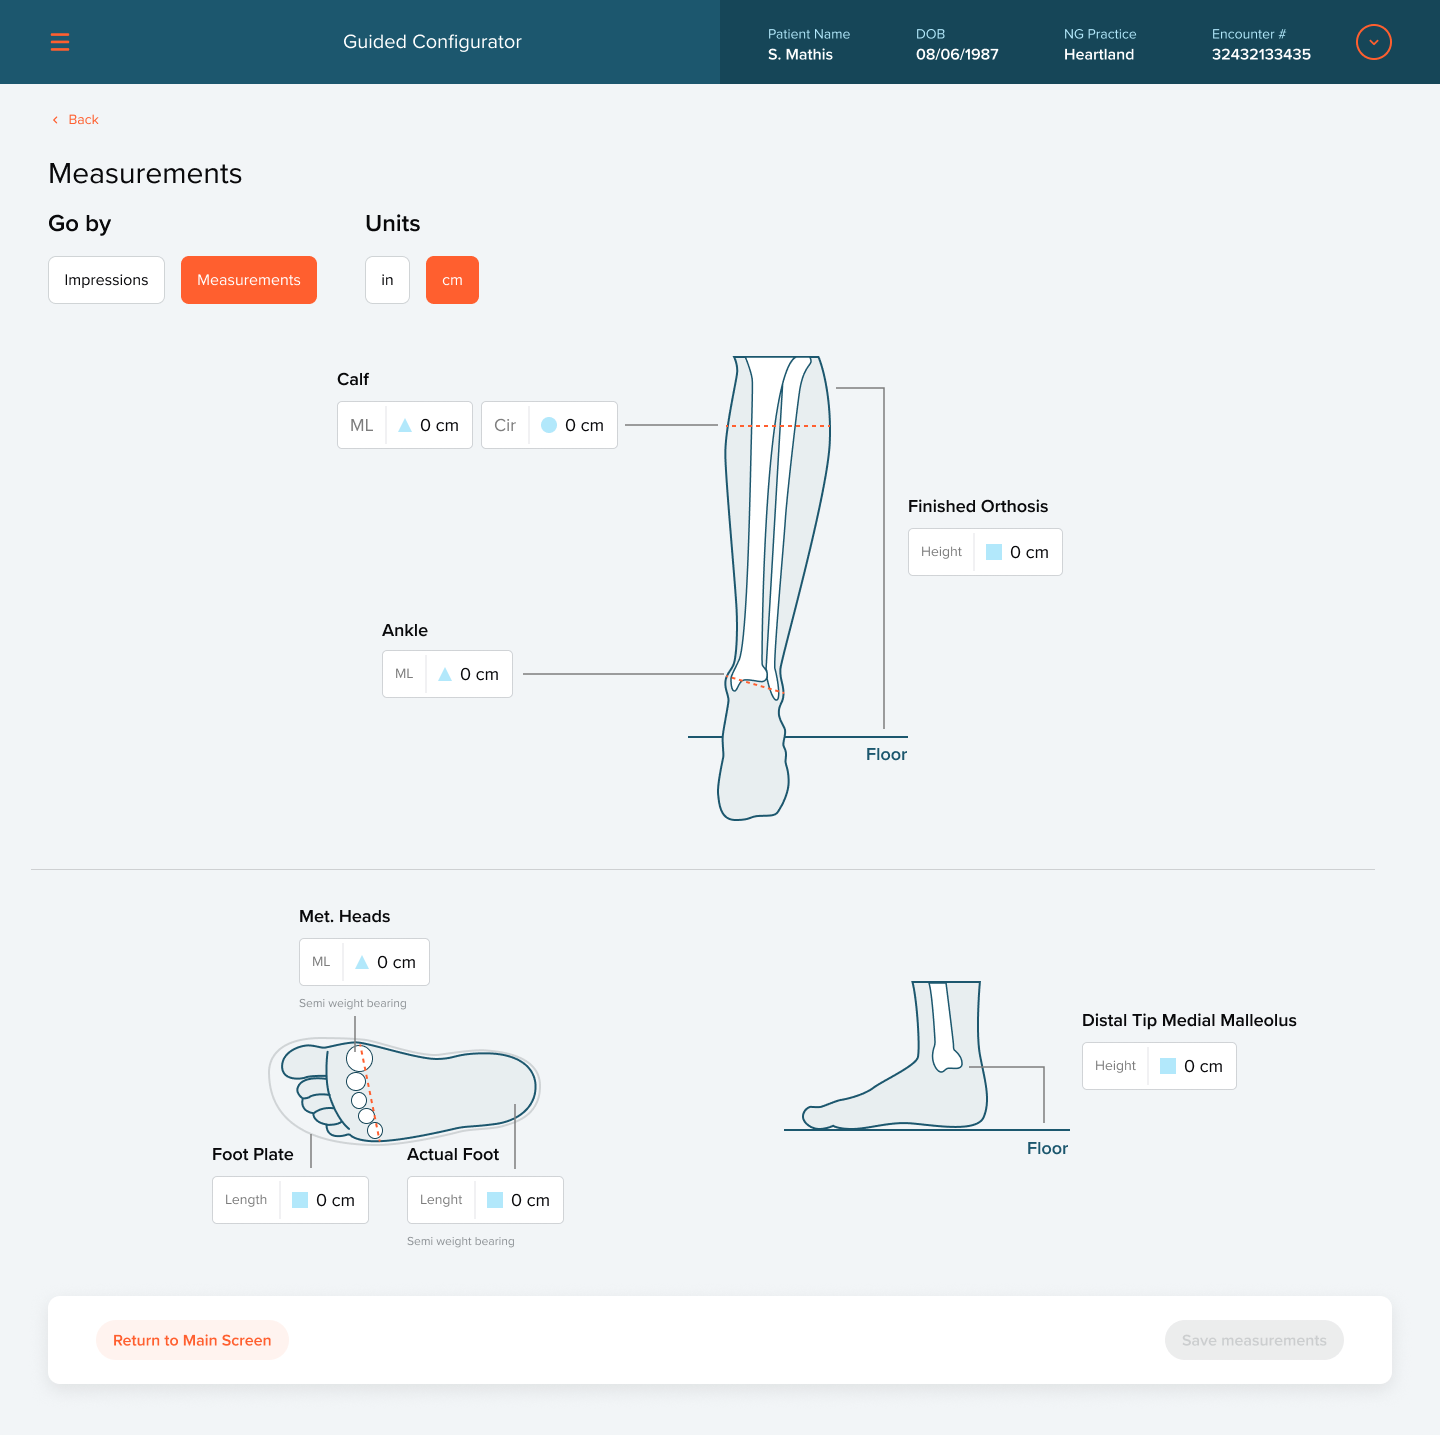
Measurements are spatial. A list of empty fields hides where each one is taken.

Action

Put the fields on the anatomy. Each measurement sits next to the exact point on the leg or foot it describes, with a choice to go by impressions or measurements and a quick switch between inches and centimeters.

Measurements step with inputs placed on leg and foot diagrams for calf, ankle, metatarsal heads, foot plate, and malleolus height.
04
Truth

Materials and colors are hard to picture from a dropdown, and patients, especially kids, care how their brace looks.

Action

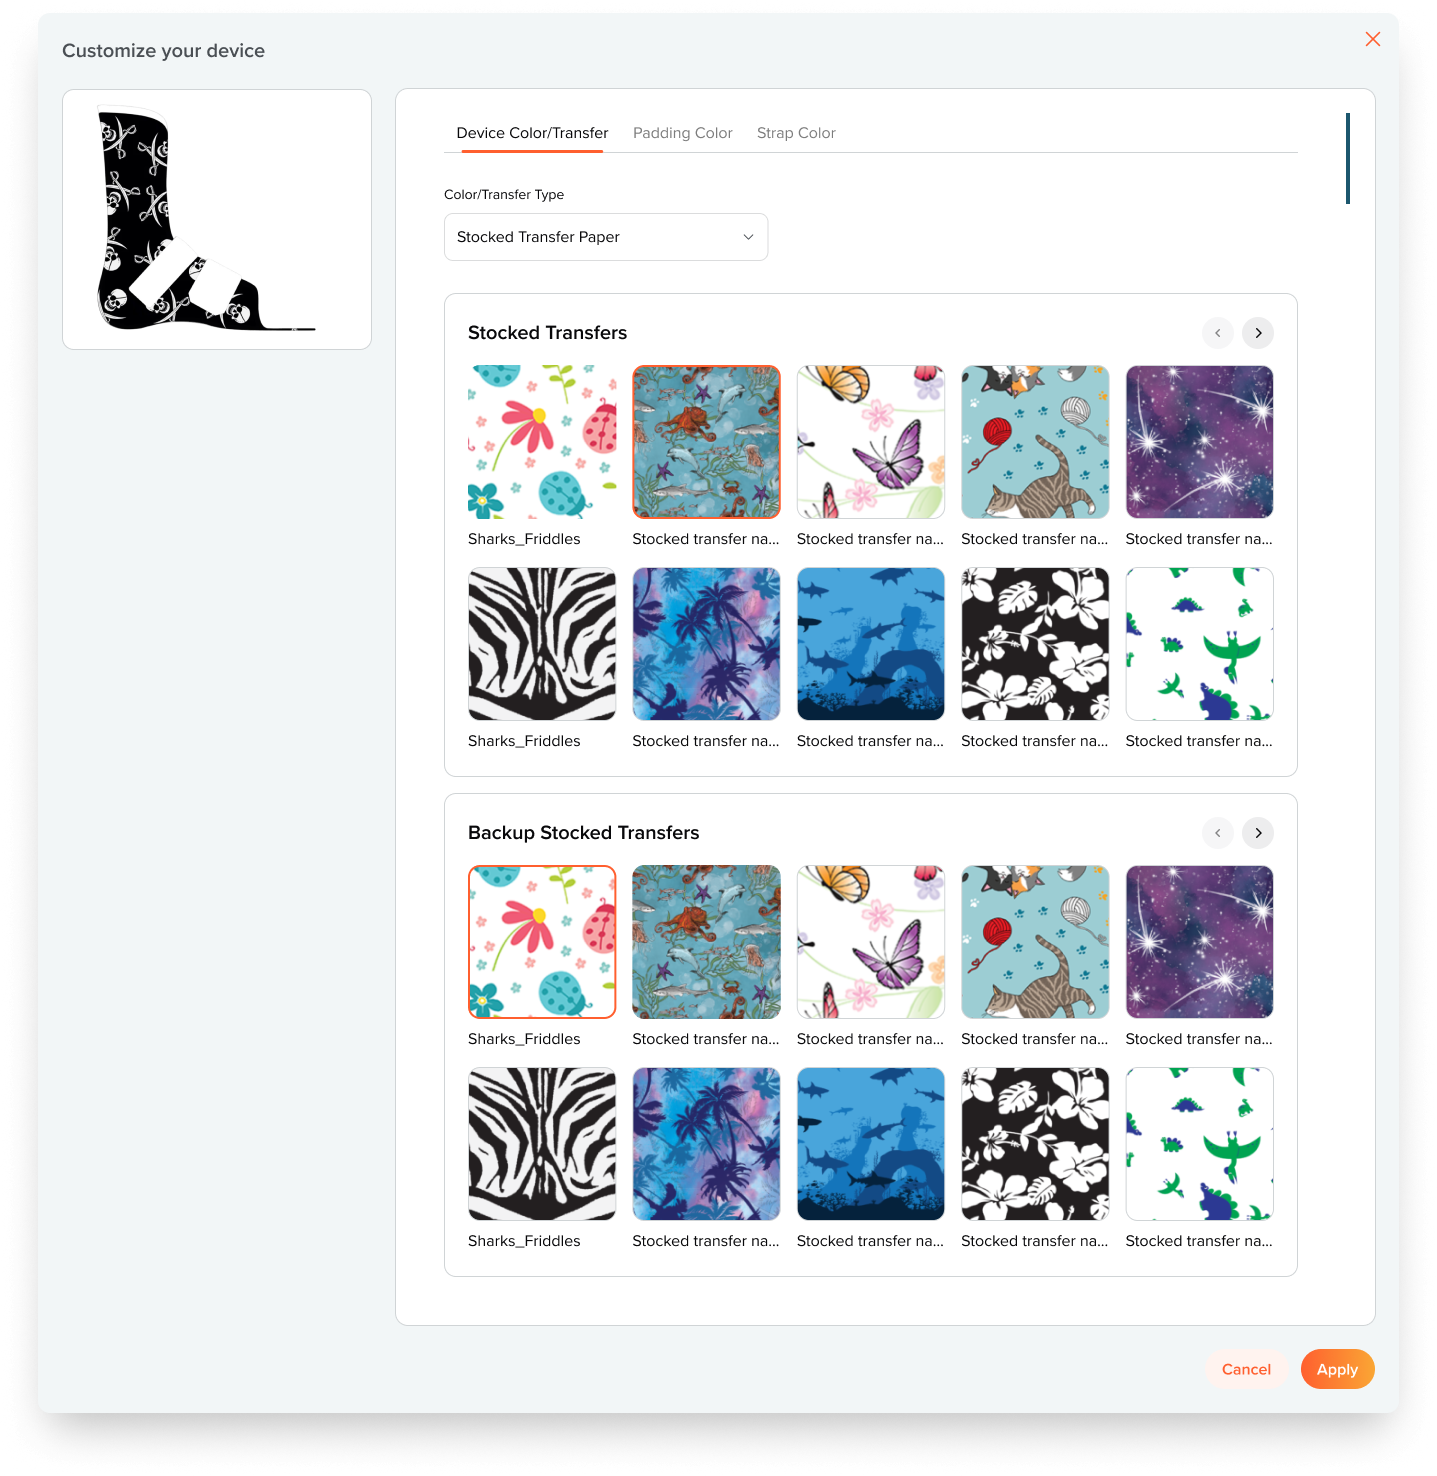
Show the device as it's being built. The illustration updates with each choice, and a customization panel lets clinicians pick a transfer pattern, a backup pattern, padding, and strap color together with the patient.

Customize your device: a device preview with tabs for color transfer, padding color, and strap color, and a grid of stocked transfer patterns.
04 / The hardest call

Expert depth, without the wall of fields.

Fabrication needed

Every specification, in precise clinical terms, on every order. Nothing could be simplified away.

Clinicians needed

To move quickly through a long form without losing their place, and to get help on the less common fields without leaving the screen.

What we did

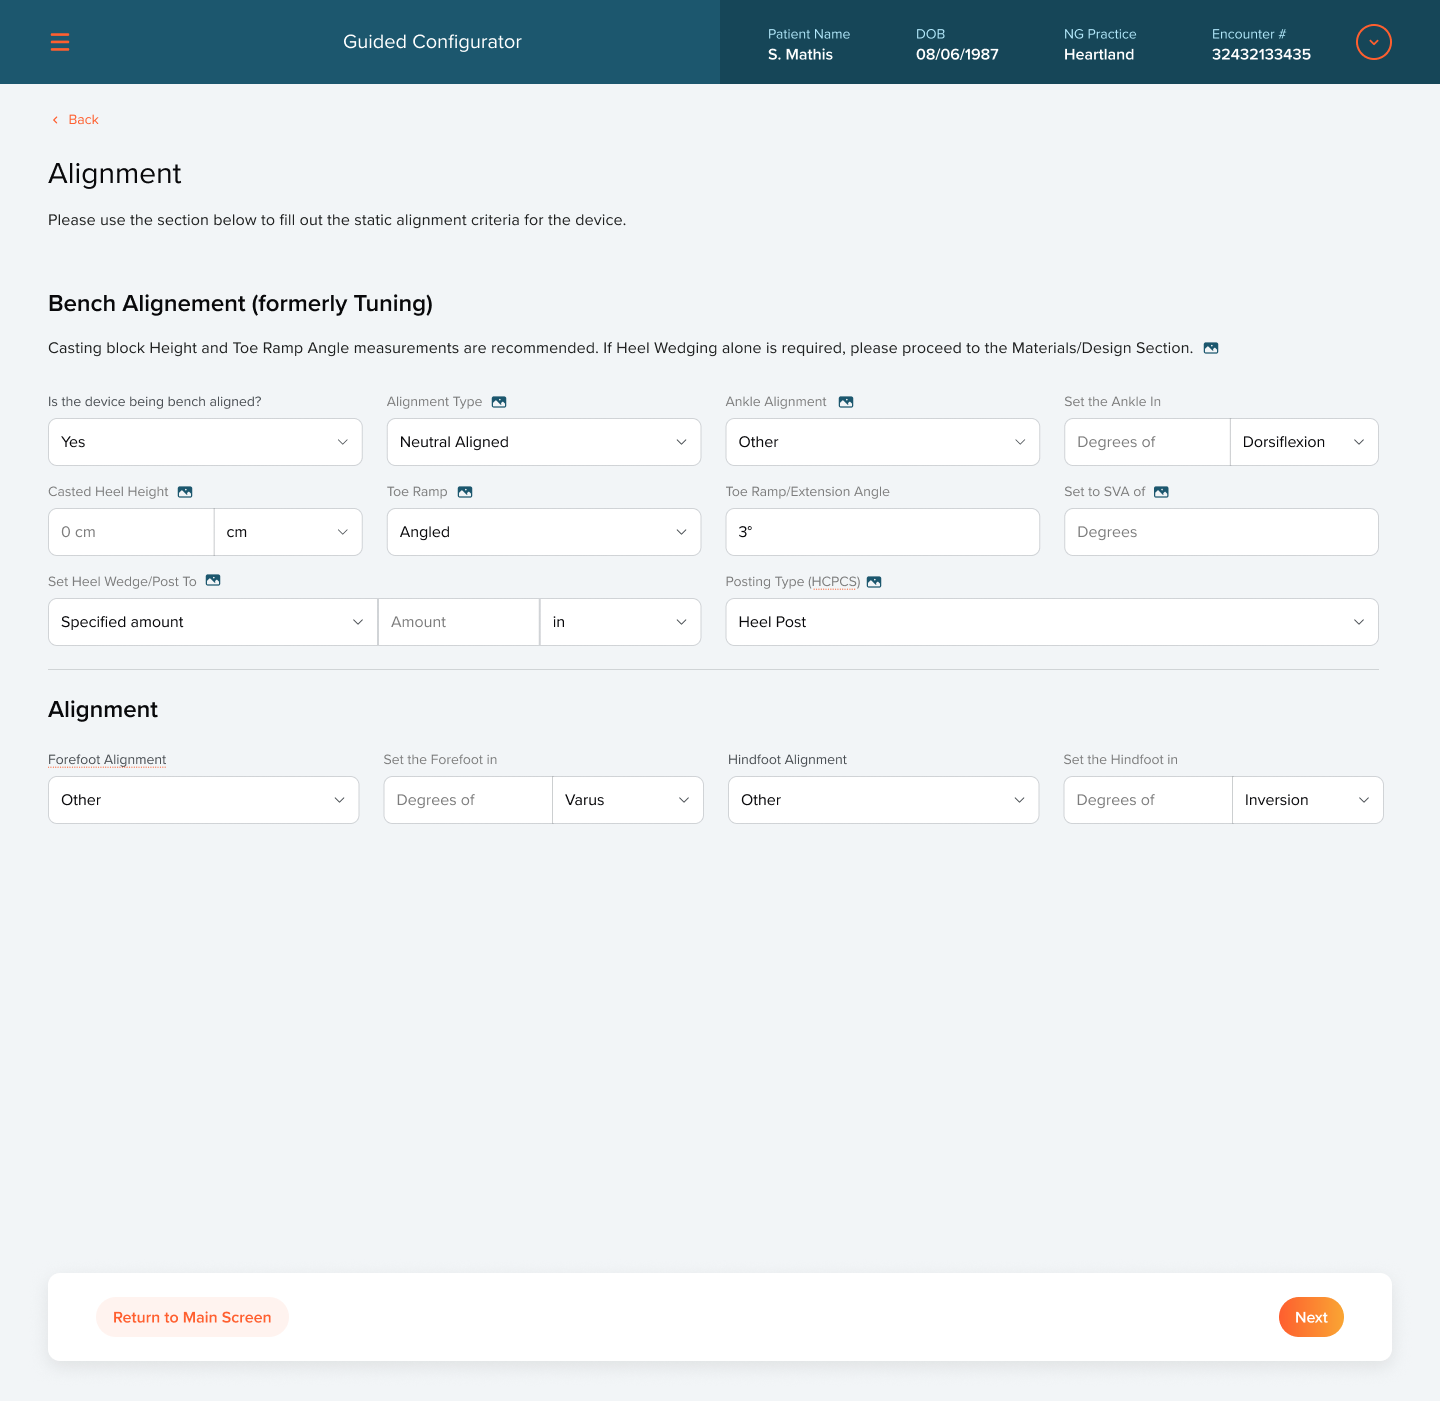
We kept the full depth and changed how it's met. Fields are grouped the way a device is built. Follow-up fields appear only when an answer needs them, like alignment details once a device is marked for bench alignment. A small reference icon next to technical fields opens an example image. When a term changed, the old name stayed beside the new one, as in "Bench Alignment (formerly Tuning)," so experienced users weren't slowed down by new language.

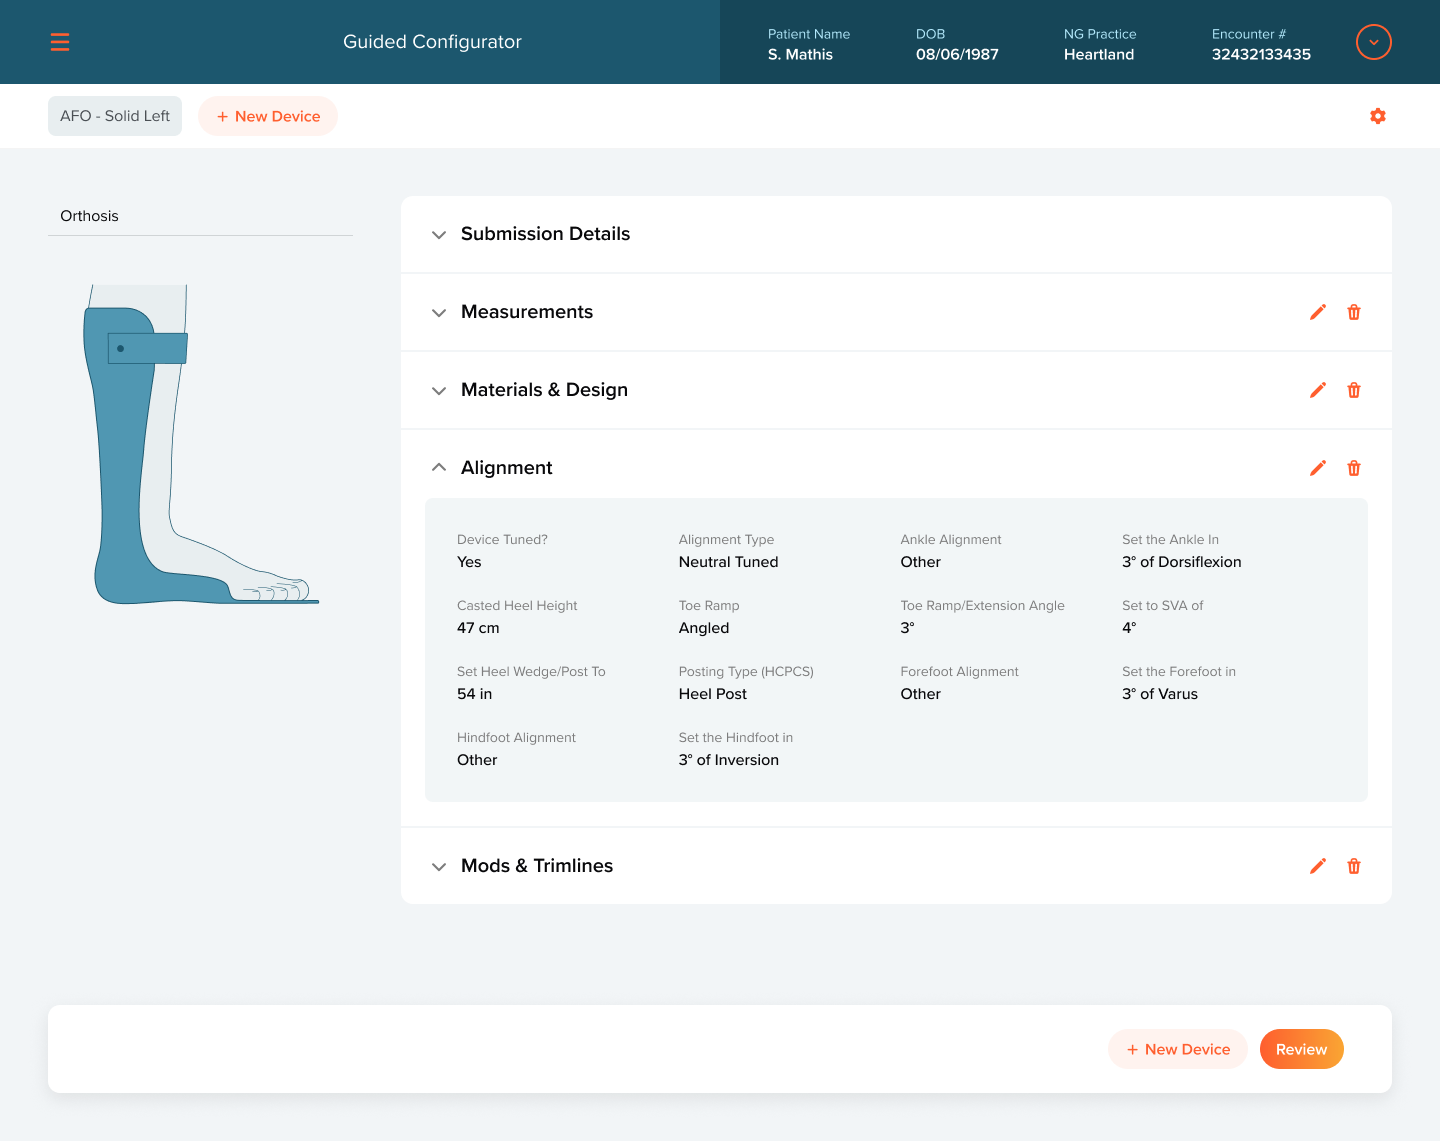
Alignment step: bench alignment fields with reference icons, and forefoot and hindfoot alignment.
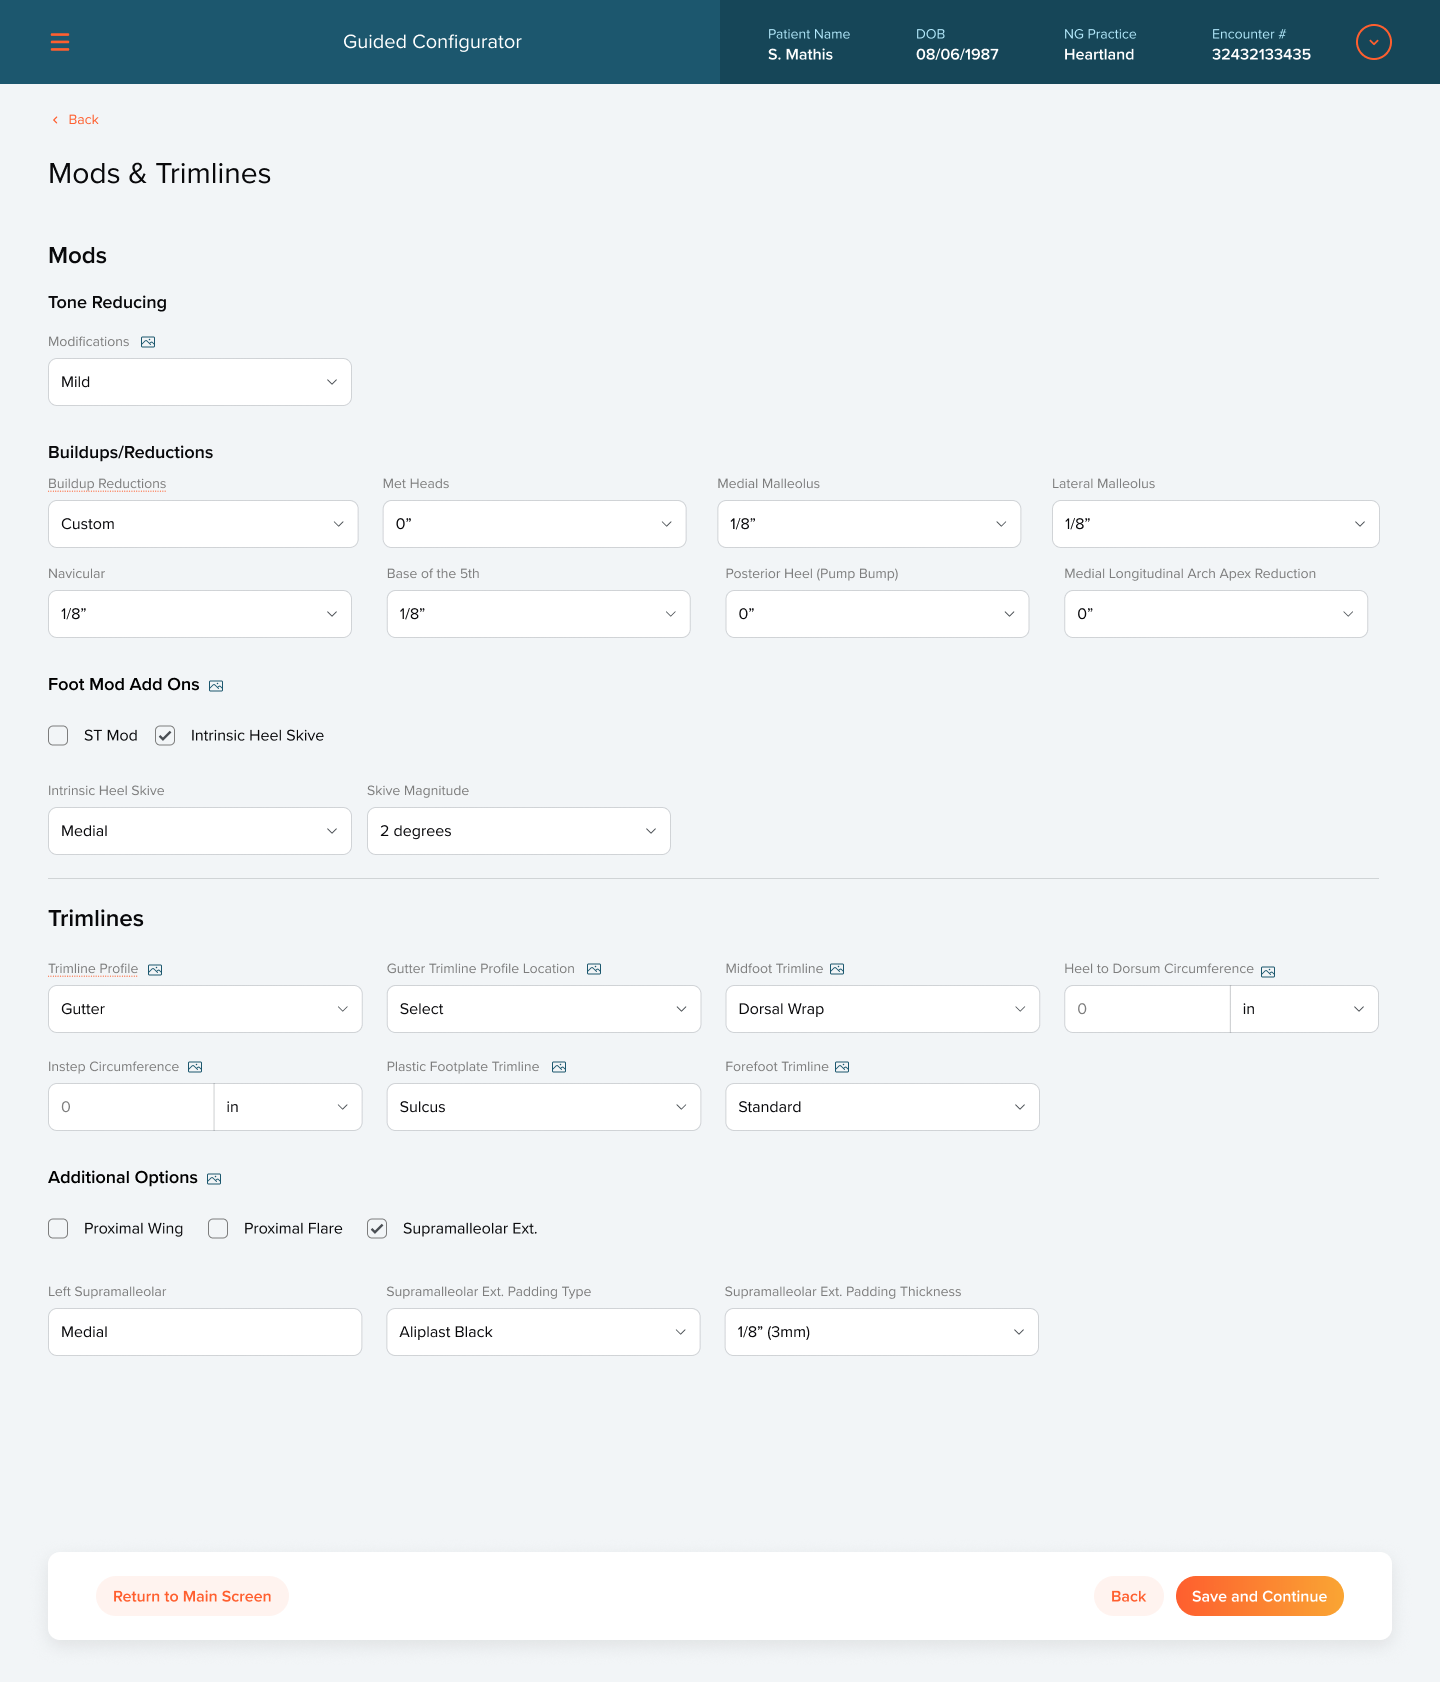
Mods and trimlines step: tone reducing modifications, buildups and reductions, foot mod add-ons, and trimline options.
05 / Getting it right the first time

Check the whole order at a glance.

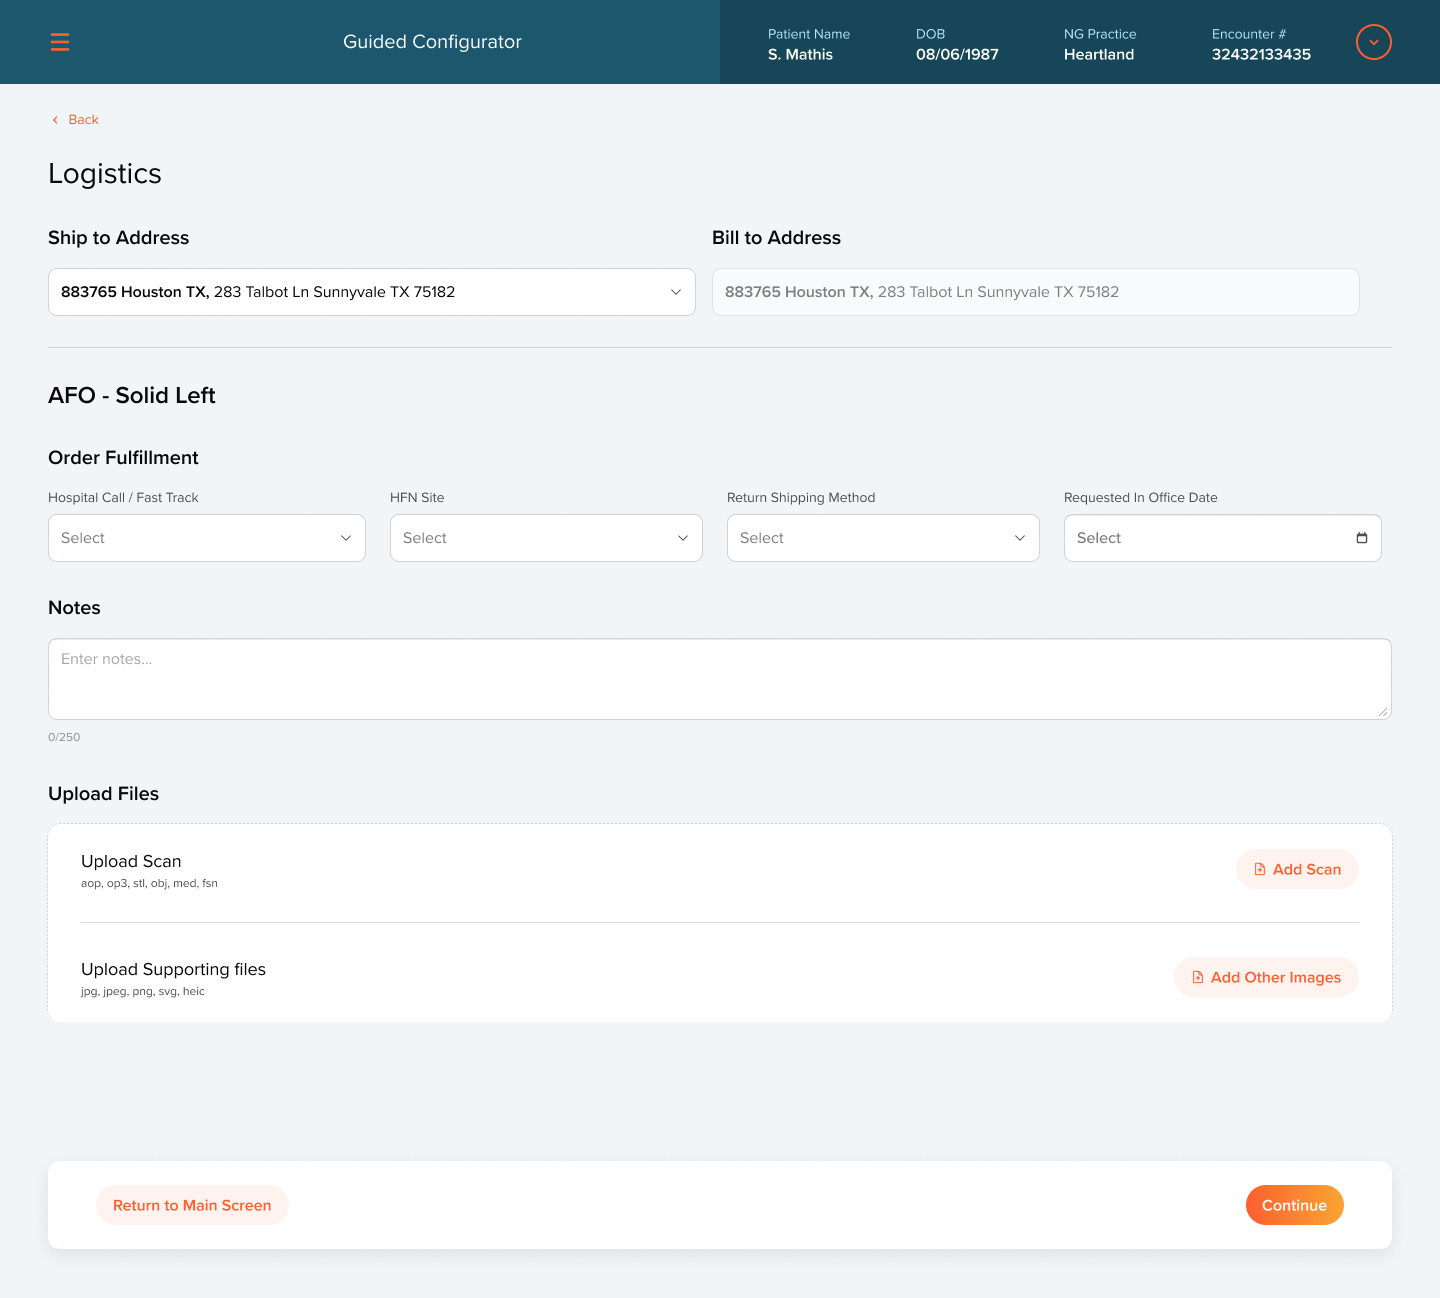
Before an order goes out, every section collapses into a readable summary next to the finished device. Clinicians can open any section to scan its values, edit it, or remove it. Logistics comes last: shipping and billing addresses, fulfillment details, notes for the lab, and uploads for 3D scans and supporting images.

Order summary with sections for submission details, measurements, materials and design, alignment, and mods and trimlines, each editable.
Logistics step: ship to and bill to addresses, order fulfillment options, notes, and scan and file uploads.
Order summary with the alignment section expanded next to an illustration of the device.
06 / Impact

$3M in growth, at 30% adoption.

The Guided Configurator contributed to $3 million in revenue growth over the previous year, while only about a third of clinicians had adopted it.

  • Orders start from the patient's mobility goals, so device choices connect to outcomes
  • Structured orders in place of phone calls and a generic web form
  • Every specification is captured in one structured order the lab can build from
  • With most clinicians still to adopt it, the impact has room to grow
07 / Looking back

What I'd carry forward.

Start from the patient, even in an ordering tool. Putting the outcomes survey first turned a spec sheet into a clinical decision.

Experts want depth and help at the same time. Conditional fields and in-place references kept the precision fabrication needed without slowing clinicians down.

Next up: adoption. Getting the configurator into the hands of the other two thirds of clinicians is where the next gains are.